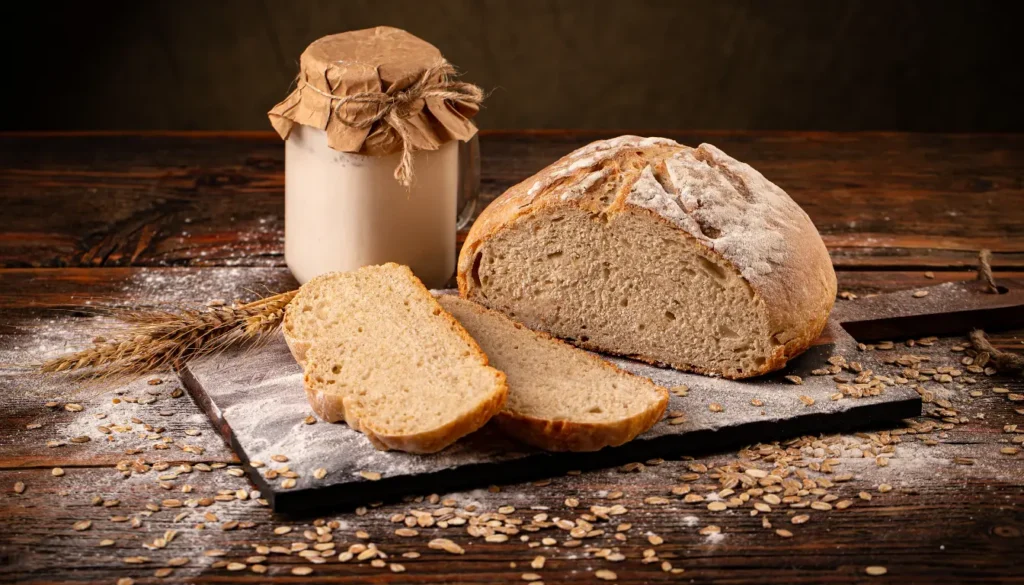
The smell of homemade sourdough bread recipe in your kitchen is truly special. This simple sourdough bread recipe welcomes you into the world of artisan bread making. It’s a journey where you’ll enjoy making rich, tangy flavors. Sourdough is loved by both experts and beginners who want to bake their own bread. It’s time to start a baking adventure that will improve your skills.
Table of Contents
ToggleKey Takeaways
- This sourdough bread recipe is beginner-friendly and straightforward.
- Homemade bread offers a unique, tangy flavor that store-bought options often lack.
- Engaging in bread baking helps develop essential baking techniques.
- Artisan bread can be made with minimal ingredients and effort.
- Creating your own sourdough starter is a rewarding process.
- Enjoying freshly baked sourdough can enhance your meals and snacks.
Introduction to Sourdough Bread Recipe
Sourdough bread recipe is an ancient tradition in baking. It’s different from regular bread because it uses wild yeast and lactic acid bacteria. These natural elements create a unique taste and texture that many love.
The key to sourdough is its fermented dough. This process not only makes the bread taste better but also makes it healthier. The slow fermentation gives sourdough its rich, tangy flavor. This method has been around for a long time, linking us to our baking heritage.
Now, sourdough is becoming more popular, and people enjoy making it at home. Making sourdough bread recipe is a fulfilling experience. It’s about using simple ingredients and unique fermentation methods. The process of learning about fermented dough and wild yeast makes baking sourdough rewarding.
Understanding the Sourdough Starter
A sourdough starter is the core of homemade sourdough bread recipe. It’s a live mix of flour and water that picks up wild yeast from the air. This starter is key for the special taste and texture of sourdough. Knowing how to care for it makes baking a success every time.
What is a Sourdough Starter?
A sourdough starter mixes flour and water that wild yeast and bacteria in the air ferment. It acts as a natural rising agent, making dough expand. Unlike store-bought yeast, a sourdough starter gives a tangy taste and better digestibility to the bread.
How to Create Your Own Sourdough Starter
Starting your own sourdough starter takes about a week. Begin with equal parts of flour and water in a clean jar. Whole grain flours like whole wheat or rye help kickstart fermentation because they’re rich in nutrients. Here’s a simple guide:
- Combine 100g of whole grain flour with 100ml of water.
- Mix until smooth and cover the jar loosely with a cloth.
- Let it sit at room temperature, feeding it every 24 hours with equal amounts of flour and water.
Soon, bubbles will form, showing that wild yeast is growing.
Feeding and Maintaining Your Starter
Keeping your sourdough starter healthy means feeding it regularly. Here are the main points:
- Feed your starter daily if it’s at room temperature. Use equal weight of flour and water each time.
- For longer storage, refrigerate it and feed it weekly.
- Check for bubble formation and smell. A healthy starter smells mildly sour.
Before baking, see if your starter has doubled in size and passes the “float test” where a spoonful floats in water. This means it’s ready for baking.
Looking after your sourdough starter turns it into a trusted ally in your baking. It not only helps with rising but also adds a unique flavor to your homemade sourdough bread recipe.
Understanding the Sourdough Bread Recipe
Making perfect sourdough bread means knowing how ingredients work together during fermentation. Flour, water, salt, and the sourdough starter mix to create a unique taste and texture. This mix leads to that tangy flavor and soft crumb we all love.
How much water you use is key in sourdough baking. More water makes the crumb open and the bread chewy. Less water gives a tighter crumb. Using a scale to measure flour ensures your dough is always right.
Choosing the right flour is also crucial. Bread flour with more protein is best for gluten development. This gluten makes the bread chewy and gives it structure. Adding artisan techniques like stretch and fold during fermentation also improves the bread’s texture.
Here is a summary table of key components in the sourdough bread recipe:
| Component | Function | Recommended Type |
|---|---|---|
| Flour | Provides structure and flavor | Bread flour or whole wheat flour |
| Water | Activates the gluten and starter | Filtered or bottled water |
| Salt | Enhances flavor and controls fermentation | Sea salt or kosher salt |
| Sourdough Starter | Provides leavening and sour flavor | Active and bubbly starter |
Knowing these elements helps make a sourdough bread recipe that’s both tasty and traditional. Using artisan techniques can take your sourdough baking to the next level.
Gathering Your Ingredients and Tools
Starting your sourdough baking journey means picking the right ingredients and tools. It’s key to know what makes a great loaf of sourdough. Here, we’ll cover the main ingredients and tools you’ll need for baking.
Essential Ingredients for Sourdough Bread
- Bread flour: High-protein bread flour is key for gluten development, giving your bread structure.
- Water: Good water at the right temperature starts the fermentation in the sourdough starter.
- Salt: Salt boosts flavor, strengthens gluten, and helps control the fermentation.
- Sourdough starter: An active starter is crucial for rising the bread and adds flavor.
Recommended Baking Equipment
Having the right tools makes baking sourdough better. Here are the best tools for great sourdough:
- Digital kitchen scale: A scale is key for measuring ingredients accurately, ensuring consistency.
- Mixing bowls: Different sizes are needed for mixing and resting the dough.
- Dough scraper: Great for handling the dough and cleaning up.
- Dutch oven: Perfect for creating steam during baking, which helps make a crusty bread.
- Bench knife: Handy for cutting and shaping the dough.
| Ingredient/Tool | Purpose |
|---|---|
| Bread flour | Provides structure through gluten development. |
| Water | Activates fermentation and hydrates the flour. |
| Salt | Enhances flavor and controls fermentation. |
| Sourdough starter | Leavens the bread and contributes to flavor. |
| Digital kitchen scale | Ensures precise ingredient measurements. |
| Mixing bowls | Used for mixing and resting dough. |
| Dutch oven | Creates steam for a crispy crust. |
Step-by-Step Instructions for Making Sourdough Bread
This guide takes you through the steps to make sourdough bread. It covers the key stages that lead to a delicious outcome. Starting with mixing the dough, each step is crucial for the final product.
Mixing the Ingredients
First, collect your ingredients: flour, water, salt, and sourdough starter. Put these in a big bowl to start. Mix them well until they form a shaggy, cohesive dough. This is the beginning of your sourdough adventure.
Autolyse and First Rise Explained
After mixing, let the mixture rest. This is called autolyse, which makes the flour absorb water better. After 30 minutes to 1 hour, add salt and more water. This improves flavor and texture. The dough will start to rise. Watch for it to get bigger and have a slightly domed top. These signs mean it’s time for the next step.
Shaping the Dough and Second Rise
When the first rise ends, shape the dough. Put it on a surface dusted with flour and shape it into a ball or loaf. Then, let it rise again. This second rise is important for flavor and structure before baking.
| Step | Description | Timing |
|---|---|---|
| Mixing | Combine flour, water, salt, and starter to create a shaggy dough. | 15-20 minutes |
| Autolyse | Let the dough rest to hydrate before adding salt. | 30-60 minutes |
| First Rise | Allow the dough to rise until doubled. | 2-4 hours |
| Shaping | Shape the dough into a loaf or ball form. | 10 minutes |
| Second Rise | Let the shaped dough rise again before baking. | 1-2 hours |
Baking Techniques for Perfect Sourdough
Getting the perfect sourdough loaf is all about the right baking techniques. The oven temperature is key for a beautiful rise, known as oven spring. Using the right tools also makes a big difference in your Dutch oven sourdough.
Importance of Oven Temperature
Your oven’s temperature is crucial for baking success. It’s important to preheat it to about 450°F (232°C). This high heat creates steam that makes the dough expand fast. This leads to a loaf with a great crust and soft inside.
Knowing how to keep this heat steady is key to doing well.
Using a Dutch Oven for Baking
Baking in a Dutch oven is great for sourdough bread. The cast iron keeps heat well and creates a steamy space. This steam helps the crust develop well.
It also stops the crust from getting too hard too soon. This lets the dough rise fully. It’s like what professional bakers do, giving your bread an artisan look.
| Technique | Benefits |
|---|---|
| High Oven Temperature | Enhances oven spring, creates a robust crust |
| Using a Dutch Oven | Retains moisture, promotes steam, ensures even baking |
| Preheating | Sets optimal temperature for initial rise, affects texture |
Common Troubleshooting Tips for Sourdough Baking
Sourdough baking is rewarding but can be tricky. Knowing about under-proofing and over-proofing helps bakers do better. Here are tips for fixing common dough problems.
Understanding Under or Over-Proofing
Under-proofing means the dough didn’t rise enough. This can make the loaf dense and lacking in flavor. Look for a dough that’s too firm and doesn’t get much bigger in the oven.
Over-proofing is when the dough rises too much. This can cause it to collapse or spread too much when baking. Signs include a dough that looks very puffy and feels too soft and airy.
Fixing Common Dough Issues
Fixing dough problems can make sourdough baking better. Here are ways to solve these issues:
- Adjust Proofing Time: If the dough is under-proofed, let it rise longer. Check it often to get it just right.
- Temperature Control: Make sure the dough ferments at 75°F to 80°F. This helps the yeast work well.
- Shaping Techniques: For over-proofed dough, reshape it and let it rise a bit less before baking.
| Issue | Signs | Suggested Solution |
|---|---|---|
| Under-Proofing | Dense texture, minimal rise | Increase proofing time and check dough frequently |
| Over-Proofing | Excessively soft, collapses during baking | Reshape and reduce second rise duration |
These tips can help bakers fix common sourdough problems. Knowing when dough is under or over-proofed and acting fast can make your sourdough bread much better.
Storage and Enjoyment of Your Sourdough Bread
Storing sourdough right is key to keeping it fresh and tasty. There are many ways to keep your homemade sourdough good for days. Learning these tips can make every bite special.
Best Ways to Store Sourdough Bread
Here are some top ways to keep your sourdough fresh:
- Cloth Bag: A cloth bag lets air out while keeping the crust crunchy. Great for short-term storage.
- Airtight Container: This is best for keeping the bread fresh longer. It stops the bread from drying out but might make the crust softer.
- Refrigerator: Not ideal for fresh bread, but if you’re storing it for a long time, wrap it in plastic to avoid mold.
Creativity with Leftover Sourdough
Don’t throw away leftover sourdough. There are many ways to turn it into tasty dishes. Here are some ideas:
- Sourdough Pancakes: Make a tasty batch for breakfast.
- Croutons: Season and bake stale bread into crunchy salad toppings.
- Bread Crumbs: Turn stale bread into crumbs for different recipes.
Using these tips, you can enjoy sourdough longer and make your cooking better with leftover recipes. Being sustainable in the kitchen has never been tastier!
Health Benefits of Sourdough Bread
Sourdough bread is known for its health perks, thanks to its special fermentation process. This process makes fermented bread packed with nutrients. It also makes the bread easier to digest. Unlike regular bread, sourdough breaks down gluten and phytic acid. This makes important minerals easier for your body to use.
The good bacteria in sourdough are key for gut health. They keep your gut balanced, which is important for digestion and staying healthy. Also, sourdough has a lower glycemic index than regular bread. This is great for people who want to avoid big spikes in blood sugar.
| Health Benefits | Commercial Bread | Sourdough Bread |
|---|---|---|
| Digestibility | Lower | Higher |
| Nutrient Availability | Less Available | More Available |
| Glycemic Index | Higher | Lower |
| Probiotic Content | None | Beneficial Probiotics |
Adding sourdough bread to your meals is good for your taste buds and your health. As people learn more about its health benefits, sourdough is becoming more popular.
Conclusion
Baking your own sourdough bread is more than just a task. It turns your kitchen into a place of creativity and joy. You’ve learned how to care for your starter and master the fermentation process. These skills will help you make sourdough bread with confidence, letting you try different flavors and techniques.
The smell of fresh sourdough bread in your home is amazing. It shows the effort and patience you put into making it. Every loaf is a story of your hard work and creativity. Keep making bread to enjoy the satisfaction of eating something you made yourself.
Every loaf of bread you bake is a chance to grow. Enjoy the process of learning and remember, each try makes you better at sourdough. You’ll find new ways to enjoy homemade bread with each bake. Keep trying new things, stay curious, and enjoy the results of your hard work in every slice.
FAQ


